6 Fun Ideas to Display Photos in Your Home
I love that we live in a time that is well documented and full of photos. I love that people everywhere are taking pictures of their lives – after all it is too easy not to with the incredible camera quality our cell phones have!
Where I think we fall short nowadays is what we actually do with our photos. So often we leave these magical moments hidden on our phones or displayed on social media, which doesn’t allow the people who should see them (our kids) to enjoy them. Displaying photos in your home is a way of celebrating your family and the lives you live. It is a way of showing your kids that ordinary moments are full of beauty and magic. So my 2024 challenge to you is: update the photos on your walls and find new ways to get photos off your phone and into your home.
To inspire you, I’ve brought in reinforcements. I’ve asked some of my photographer friends to share how they display photos in their home. Below are 6 ideas with tips of how to get started for home photo displays.
But before we get to that, I just have one piece of advice: choose two spaces in your home to display photos. One should be a more permanent photo space where photos are rarely changed out. Photos of grandparents, special memories, and extended family photos should live here. Think of this space of telling the bigger story of your family. For this space you’ll want to choose a timeless way to display these photos, i.e. – simple frames or canvases. Next, choose a space to display fun photos that are updated often – silly photos, soccer uniforms, family adventures, and candid photos. A high traffic area like your kitchen or family room is ideal for this type of display. Try to update this area a few times a year. It is not as hard as you think! And I promise, your family will notice and love it!
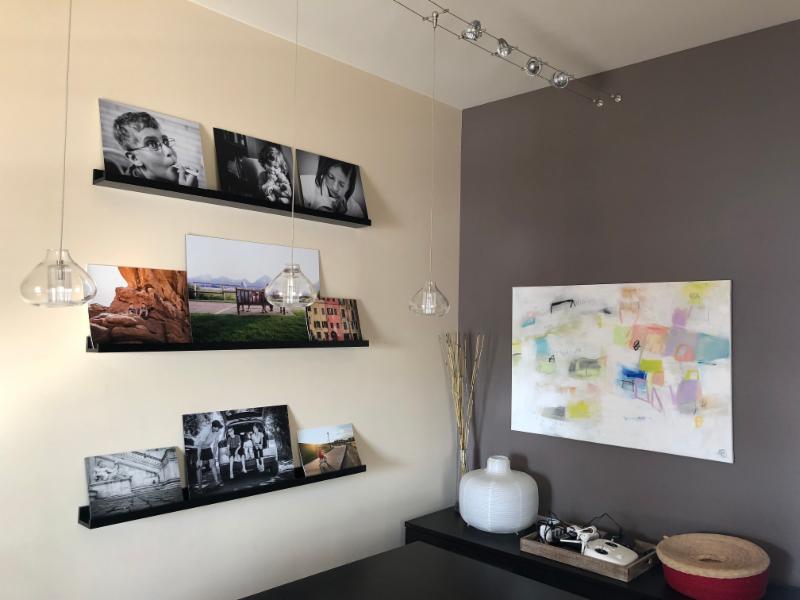
#1. Photos mounted on substrate and displayed on simple shelves
Ideas and photos below provided by Kelley Dallas, based in Denver, CO
This wall shows photo shelves (from IKEA). The photos are mounted on a substrate. When you want to switch them out it is really easy, and you don’t have to feel bad because you didn’t spend a ton of upgrade money for just a substrate.
*Kelley used black styrene purchased through
ProDPI to mount her photos.
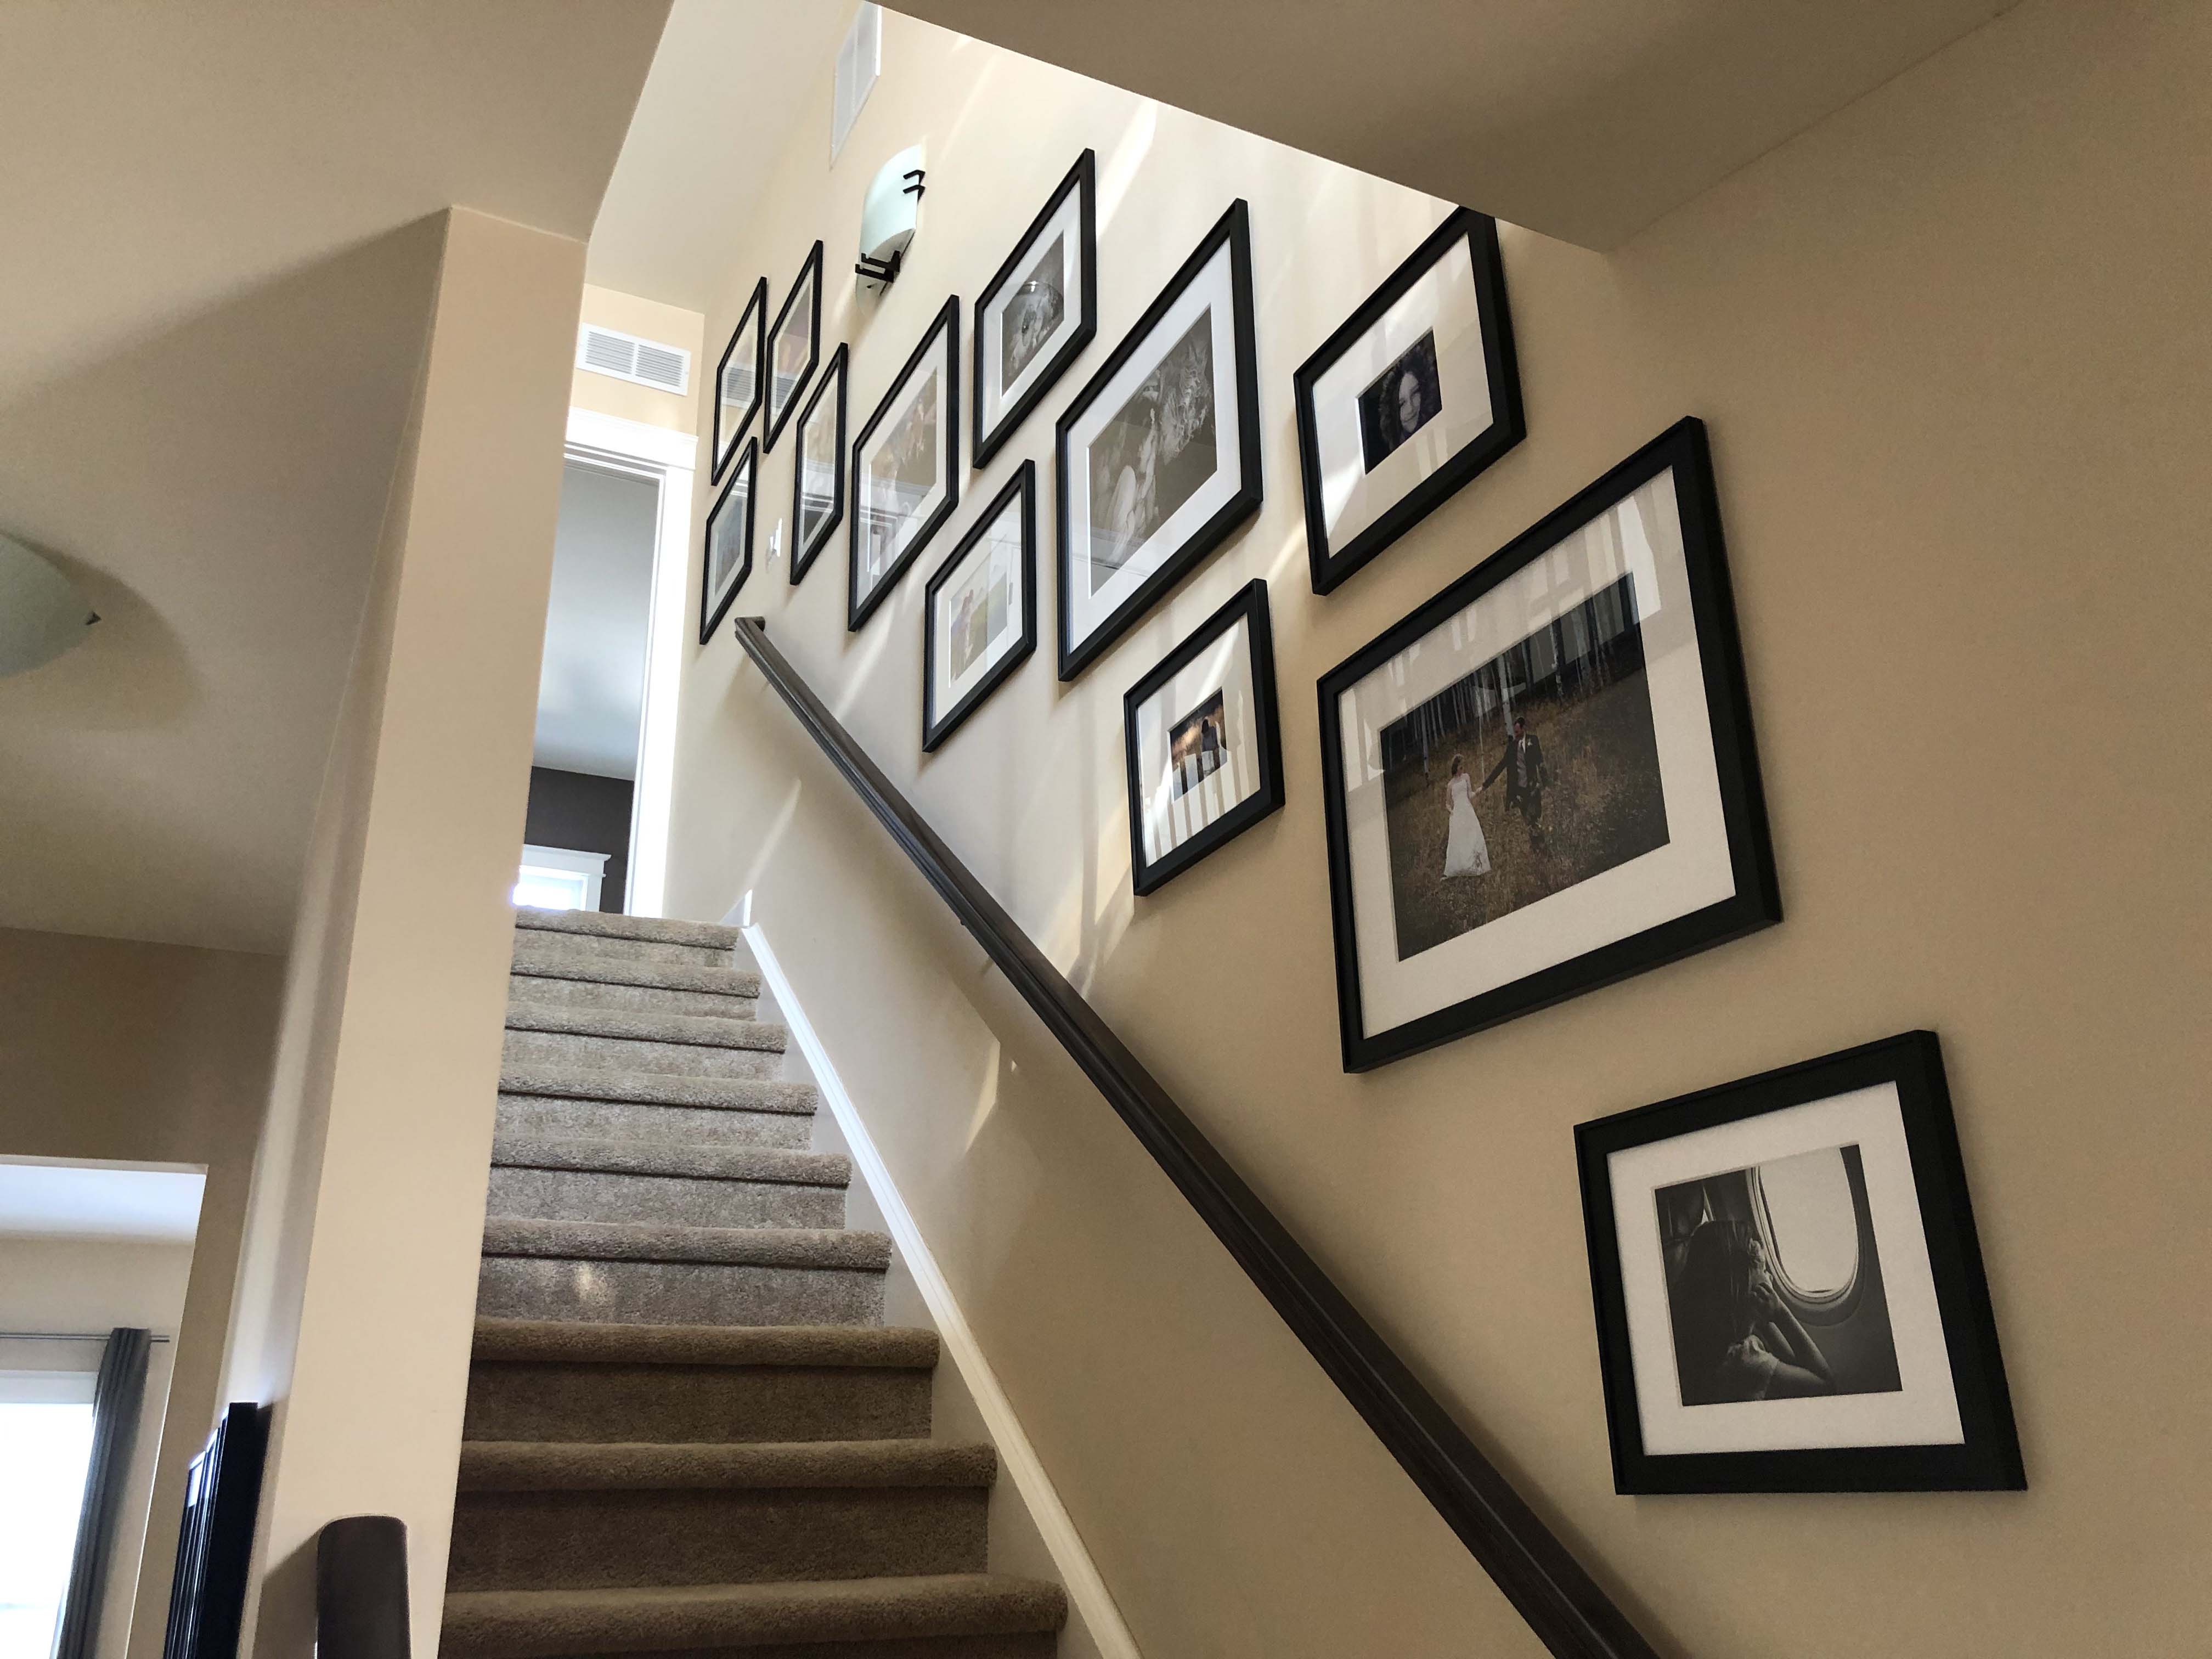
#2. Timeless Frames
This option is usually more time consuming to create at first, but easier later on because you will only switch out one or two photos a year (for example your favorite family photo from your fall photo session could be updated) and the rest are milestones that will be kept up all the time. Ikea is a great option for simple frames. It may be a good idea to purchase a few extra frames and keep for later on in case one breaks or you want to expand your area.
#3. Colorful, mixed frame photo wall
Ideas and photos below provided by photographer
Kirsty Larmour based in Abu Dhabi
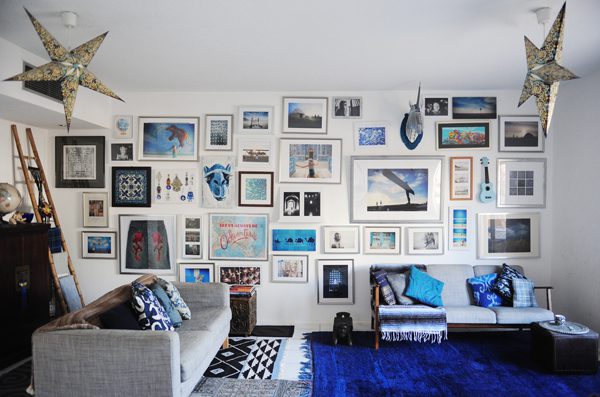
Start by deciding which photos you want to take prominence and print and frame them that way. Then lay them all out on the floor in alignment with where they’ll go on the wall to see how they’ll work. Keeping things irregular is much easier to maintain than a display with all matching sized frames and it also allows to easily add in other photos at a later date. In the example wall above, it took Kirsty approximately an hour or so to lay it all out and get it feeling right, and then maybe another couple for to hang them. Another tip is that the wall opposite the photo wall is quite plain so the room isn’t overwhelmed by the size of the photo wall!
*Side note, Kirsty was featured on Design Moms for this photo wall.
Click here to read the article and learn about her fascinating life of travel!
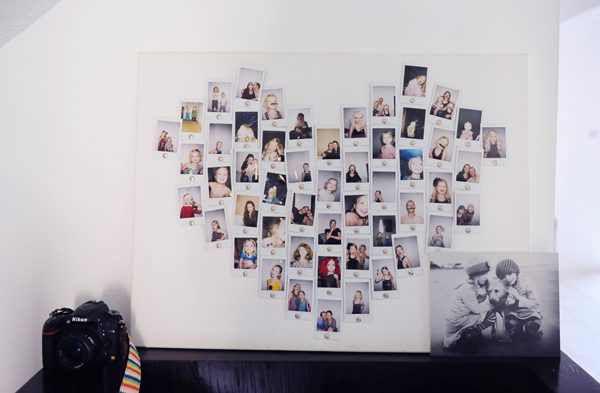
#4. Polaroids on canvas (a fun kid project!)
Kirsty says, “For the heart canvas the pictures were mostly taken by my kids with a
fuji instax and then we just used push pins on a framed canvas to mount them – because the pins are in the bottom of the photos it can be hard to keep them all upright sometimes, so you may want to add a dab of glue at the top of the photo.”
#5. Photos hanging from wood
Idea and photo below provided by photographer Amy Selleck based in Bainbridge Island, WA
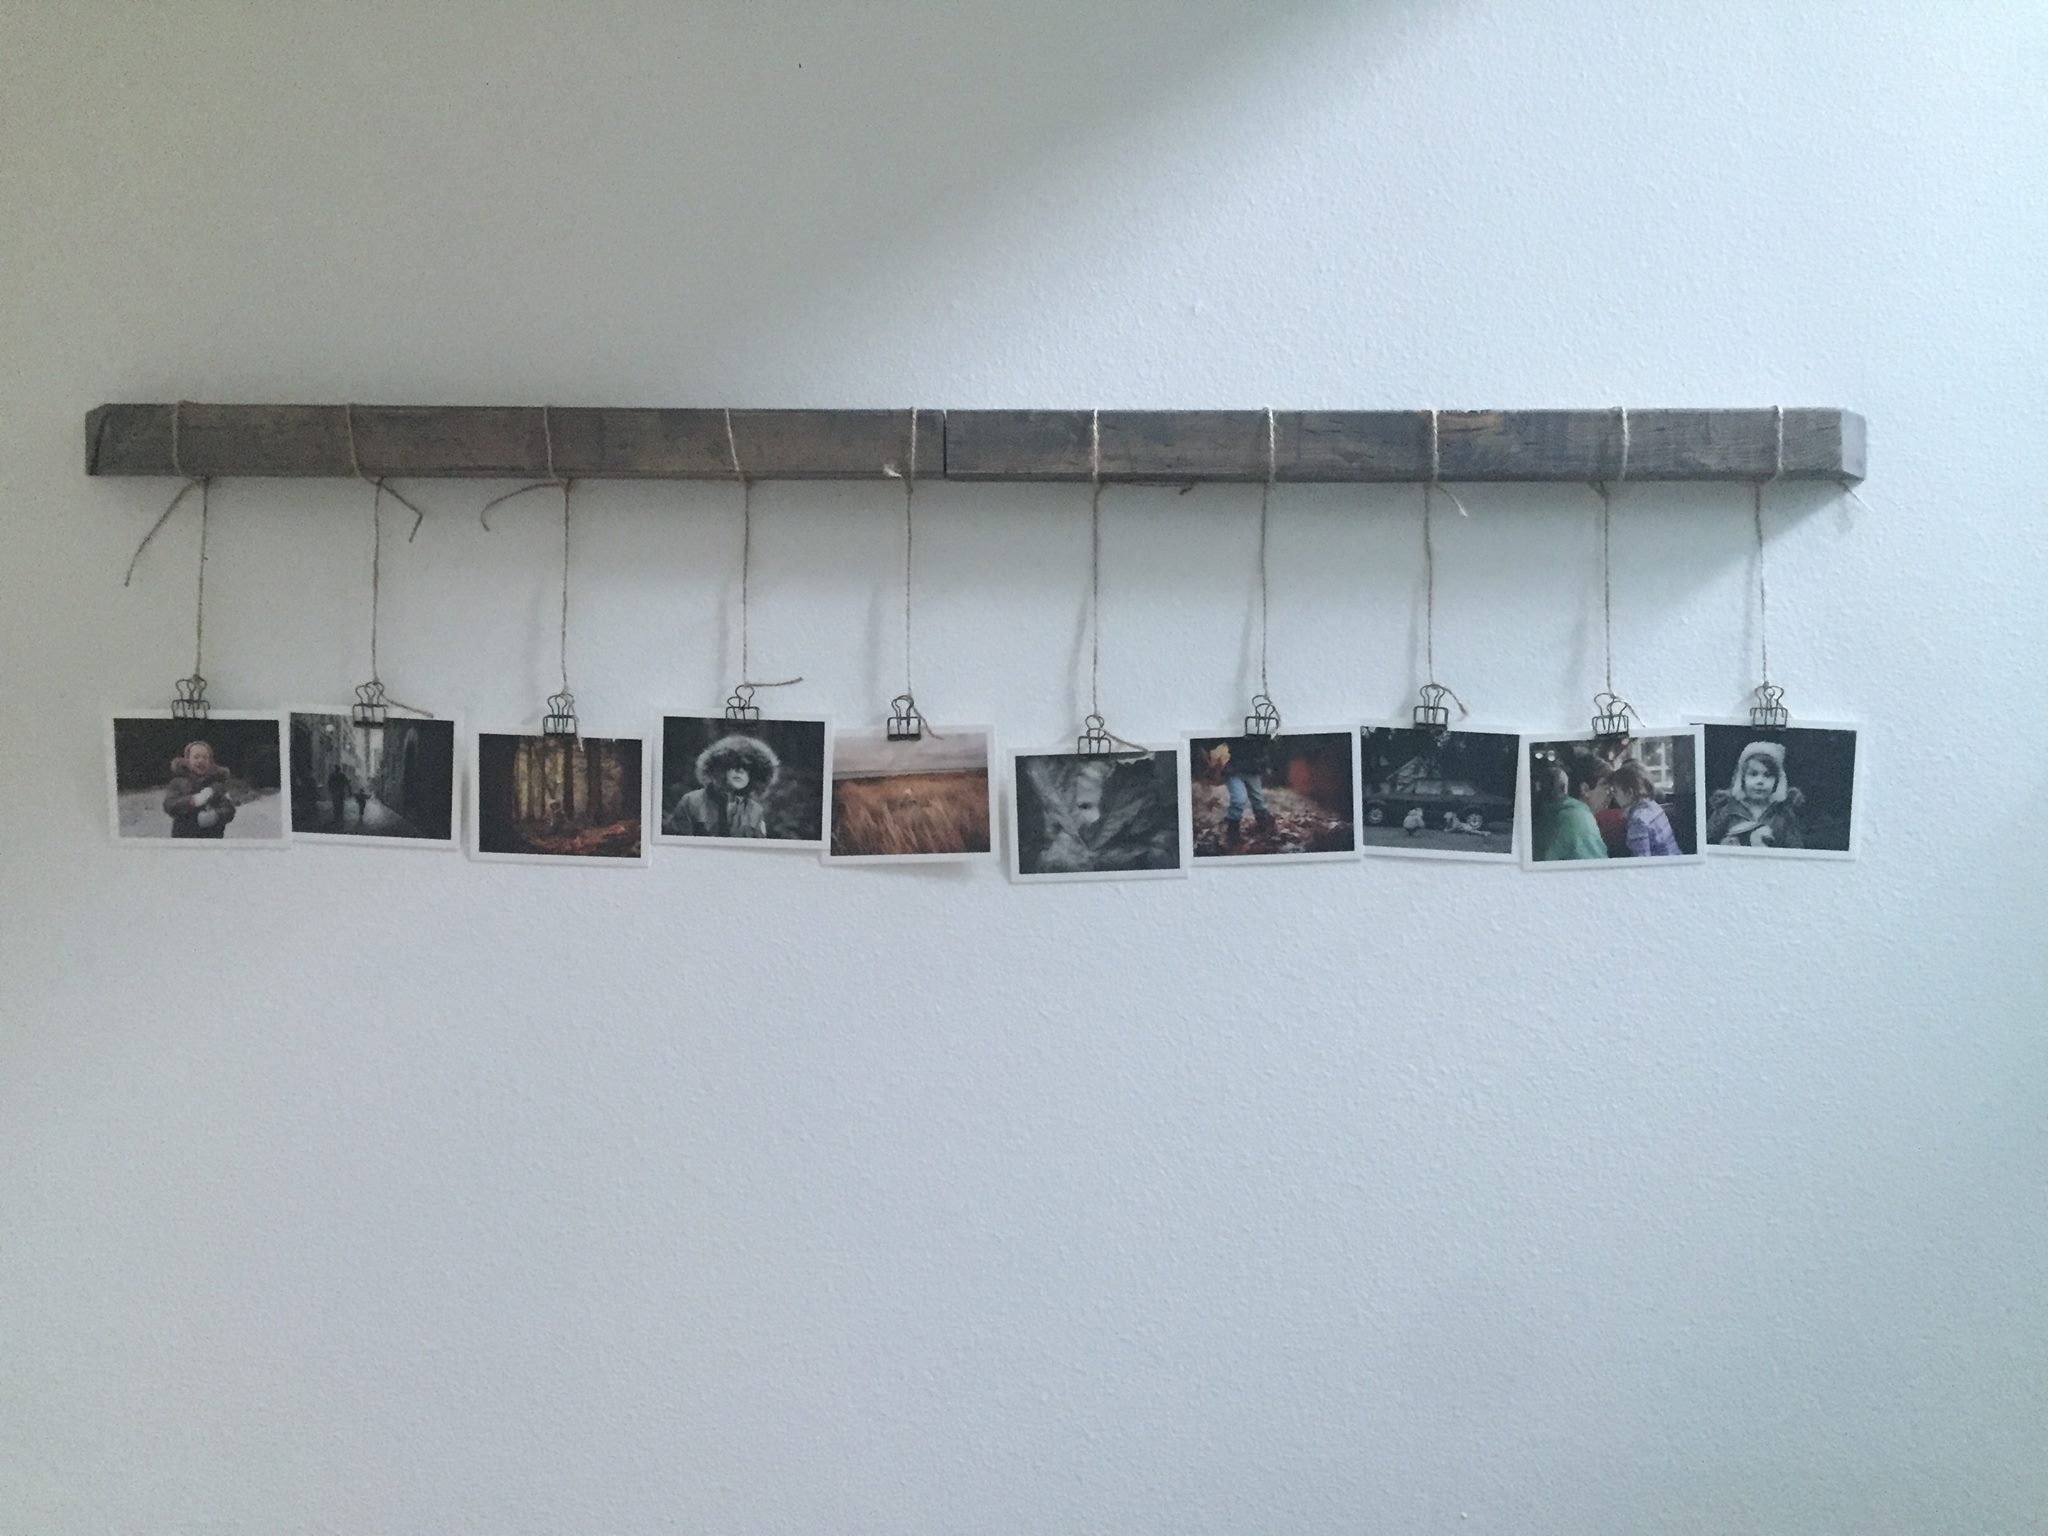
This is a simple, yet fun way to display photos in your home. It only requires a piece of wood, twine, and cute clips (
available here ) and is ideal for a hallway or entryway. You could even paint the wood or stain it to match your décor. A bright color could be used if you want to apply this idea to a kids room.
Jolene Redfern, a photographer based in San Diego has a similar idea with a twist – she used a branch found in her local park in lieu of cut wood!
So start printing those photos! It is the first step in getting them off your phone and into your home!
#6. A bold painted wall with Ikea Ribba frames
The final ideas are from me! I have two walls in my home where I change the photos multiple times a year. One of them looks very similar Kirsty’s mixed photo frame wall and I love it! I have family photos displayed, photos of the kids with their friends, silly photos from my phone – it is my anything goes wall! If the photo is fun, I print it and up it goes. I usually update a few photos on this wall in the Winter and the Summer. When I first put it up, I purchased frame bundles from Target and Home Goods and spray painted a few to add variety. When I was designing how the frames would be displayed on the wall, I made replicas of the frame sizes out of simple printer paper. Then I arranged and taped these pieces of paper on the wall to figure out exactly how I wanted it to look. This made it so easy to play with because I could easily move the paper to create the perfect display! It was a little time consuming, but so worth it! This wall is in our bonus room where the kids and their friends spend a lot of time, so I love that it includes photos with their friends.

Okay now onto my Bold Painted wall. I refer to this as my seasonal wall. I update the photos on this wall 3-4 times a year. I LOVE this wall. It sits right behind my desk. It shows off holiday photos, summer photos, fall photos, and winter photos. The best part is, it was so easy and inexpensive to create. I painted the wall in Benjamin Moore Blue Note. Then I purchased these amazing Ikea Ribba Frames for $11 each. Yes, your read that right! They come with a matte, but I chose to print my photos from Millers Lab larger and fill the entire frame. They are so easy to switch out and make for a bold statement.

I hope these ideas have inspired you to print some family photos this year! Trust me, your family will thank you for it. And don’t feel like photos need to be professional to print. Get those photos off your phone and into your home. A combination of professional and phone photos tell the best story, don’t you think? Happy Printing!!


IanaSuch wonderful and fun ideas, thanks for this!
MicheleSuch great ideas!